I think my first, real introduction to the foam roller was in Rose’s Pilates class at Centro La Paz. I mean, I knew what foam rollers were and I had messed around on the rollers at the Center a few times before, but I never really understood how freaking incredible and how extremely versatile these round pieces of foam could actually be! And after that one Tuesday morning, I don’t think I ever looked at a foam roller the same way again. I had to have a roller for my home. Rolling needed to become a part of my daily routine.
While I may be exaggerating just a little bit, I did actually purchase a foam roller (I’m loving the Manduka beLONG Body Roller) and have committed to a regular rolling routine since. My boyfriend Brian has also taken to the foam rolling, and we both seemed to have experienced very similar, positive changes – mind, body and our surfing – even just from using the roller for a few minutes each day.
So for those of you wondering – what exactly is foam rolling? Foam rolling is a self-myofascial release technique using a cylindrical piece of foam to apply pressure to trigger points throughout the body allowing overactive muscles to relax in order to improve soft-tissue flexibility. In other words, it’s essentially a self-massage tool that allows you to work out knots and release tension from your body.
And we could all use a little less tension in our bodies. I always find it so interesting how surfing creates so much tightness in the body (hips, low back, chest), yet in order to surf – and to be fluid and stylish on top of that – you must be open and flexible are free (think: loose hips). Tightness within the body leads to a lack in range of mobility, and if the muscles can’t stretch properly then you’re way more likely to strain and even pull your muscles. Plus, when a muscle is all knotted and kinked up there’s no way it can possibly show off its full strength and capability. And this is where, I think, yoga and similar self-care practices like foam rolling, are the connecting bridge that opens the gates for improvement: longer sessions with more waves and even a little bit more power and style while you’re riding them.And if surfing is not your thing – I can guarantee that yoga, and other similar self-care practices, will help you improve in ANY area of your life. Bold statement, I know, but I stand behind it.
So anyways, foam rollers are amazing and they aren’t just limited to a self-massage tool. While they are great for a little deep-tissue loving, they are also great for stretching and strengthening. Foam rollers can be incorporated into your yoga practice as a prop to help modify or deepen a pose, or used as an unstable surface to really activate the core and ramp up a number of full-body exercises.
To get you started, here are three basic ways to get some self-love from your foam roller:
The IT Band Roll
The Iliotibial Band (more commonly known as the IT Band) is a thick band of fibers that begins in the pelvis (the iliac crest), runs down the outside of the thigh, and attaches just below the knee at the top of the shinbone (the tibia). Tightness and inflammation of the IT Band (also known as IT Band Syndrome) is a common cause of knee pain – especially in runners and cyclists and even surfers.
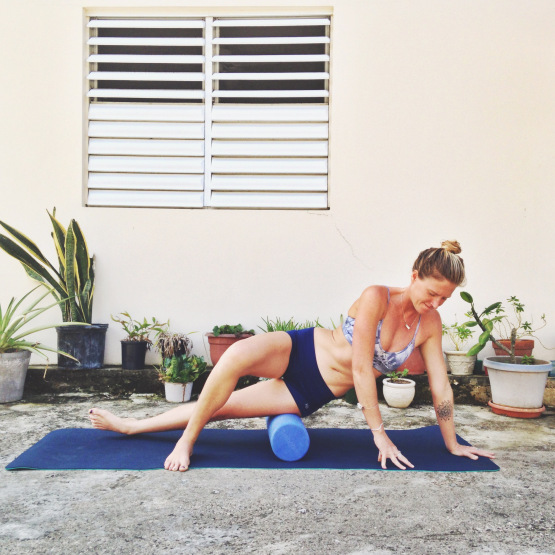
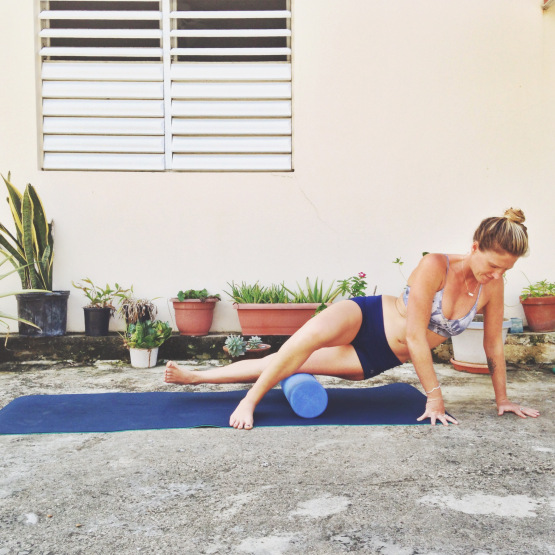
- To begin, lay on your side with the foam roller under the upper, outside area of the right thigh. Keep the right leg hovering over the ground, lift the left leg, bend the knee and place the left foot in front of the right leg. Use your arms, core, and left foot to support your body weight.
- Slowly roll from the top of your thigh, down the outside of the thigh, to right above the knee, and back up the thigh towards the hip. Use your breath to help you relax as well as your arms, core, and left leg to increase/decrease pressure.
- Continue this for 10 rounds, moving slowly and mindfully, noticing any areas of tension (trigger points). If you find a spot that is extra sensitive, allow yourself to hold that position on the foam roller for a few breaths.
- Repeat steps 1-3 on the other side.
Foam Roller Push-Ups
If you’re getting bored with basic push-ups, ramp up your routine by adding in a foam roller! The instability of the roller makes your muscles and core work extra hard.
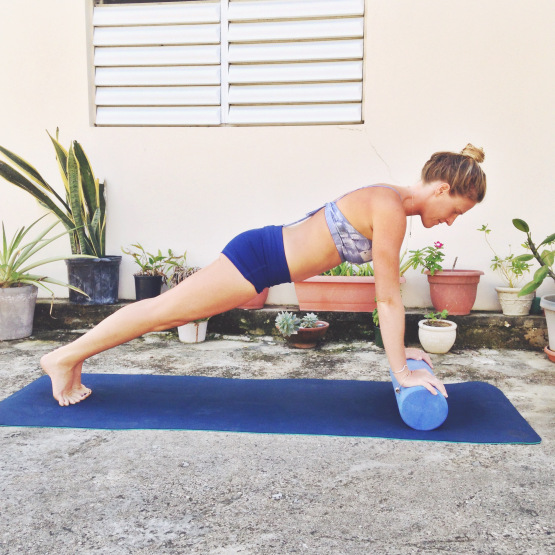
- Come into a high push-up position and bring the foam roller underneath your hands keeping the hands shoulder-width distance apart. Spread out your fingers so that you activate through the hands and lift up out of your shoulders.
- Stack the shoulders over the wrists as you pull the belly button up to the spine. Feel your tailbone reaching back towards your heels and press back through the heels to help activate the legs.
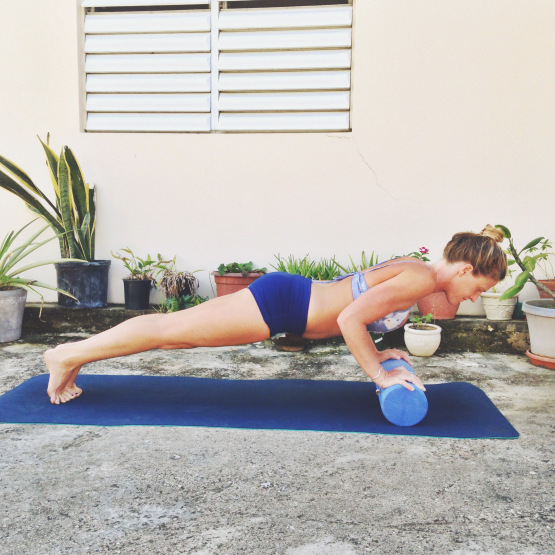
- Take an inhale in the high push-up and as you exhale lower to a low push-up position, bringing the chest to a hover over the roller. Try and keep your elbows hugging in towards your ribs.
- On the next inhale, press back up into high push-up and continue with your breath.
- Aim for 3 sets of 10 push-ups. You can always drop your knees to the floor in order to make the exercise easier.
Savasana with Roller as Prop
One of the most beloved asanas of them all. With a foam roller you can take this deep-relaxation yoga pose a tiny bit deeper. This could be especially helpful if you experience any low back pain while lying flat on the floor, which is usually due to hyperextension of the low back (sound familiar, surfers?)
- Lay down on your back and slide the foam roller underneath your knees.
- Slow down your breath and soften from your head to your toes.
- Stay with your body and with your breath for 10 minutes.
- When you’re ready, slowly make your way out. Hug your knees to your chest and acknowledge yourself for taking the time to rest and relax.


